
There’s a unique satisfaction in restoring a damaged dial or creating a custom watch design. Few hobbies combine precision, creativity, and technical skill like painting a watch. Yet, many enthusiasts shy away from it because painting a watch perfectly is notoriously difficult. On such a microscopic scale, even a minor error becomes glaring under magnification.
Achieving professional-quality results at home requires realistic expectations. There’s a difference between a DIY hobbyist finish and the flawless perfection of a professional watchmaker. Still, with the right materials, tools, preparation, and patience, you can achieve stunning results.
This guide will cover everything you need to know: understanding watch painting basics, essential tools, preparation, painting techniques, finishing, advanced methods, troubleshooting, and practice tips. Whether you’re restoring vintage dials, customizing a watch, or repairing damaged hands, this comprehensive tutorial will show you how to paint a watch perfectly.
Understanding Watch Painting Basics
What You’re Actually Painting
When painting a watch, you’re typically working with several components. Watch dials are often made of brass, stainless steel, or aluminum and require careful preparation.
Watch hands, usually crafted from brass or steel, demand extreme precision due to their small size and intricate shapes. Additionally, watch cases may receive minor paint touch-ups or refinishing, particularly on bezels or small areas, to restore or enhance their appearance.
Professional vs. DIY Methods
Professionals rely on methods like pad printing, vitreous enamel, and electroplating. These produce durable, precise, and long-lasting results, but they require specialized equipment.
DIY enthusiasts often use hand painting, spray painting, or waterslide decals, which are accessible at home but require careful technique. Compromises are often necessary for home projects, and quality expectations must be realistic.
The Challenge of Magnification
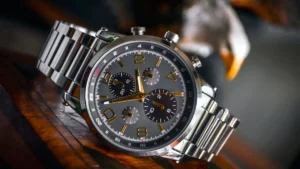
Watch dials are typically viewed through a crystal lens, which magnifies every detail. Even tiny imperfections, brush strokes, or uneven paint can become visible.
Proper technique and attention to detail are critical for producing a finish that looks professional. Magnification tools like jeweler’s loupes or microscopes are indispensable.
Essential Materials and Tools
Paint Types
Enamel Paint (Most Recommended)
Oil-based enamel is highly durable and provides a smooth, long-lasting finish, making it the superior choice for painting watch dials and hands.
Testors enamel is a popular option among hobbyists for its reliability and availability. To ensure proper adhesion to metal surfaces, it’s essential to apply a zinc-based primer before painting.
Acrylic Paint
Acrylic paint is a quick-drying option that is particularly useful for lume applications or small touch-ups. However, it is less durable than enamel and requires proper mixing to achieve the right consistency and a smooth, even finish on the dial or hands.
Specialized Paints
For specialized watch painting, luminous or lume paint is used on hour markers and hands to ensure visibility in low light.
Nail polish can serve as a creative option for decorative accents, while automotive touch-up paint is ideal for small bezel refinishing, providing precise color matching and durability.
Alternative Methods
Alternative methods for watch painting include using spray paint to achieve even base coats across the dial or hands. After painting, applying a clear lacquer or UV coating helps protect the finished paint, providing durability, scratch resistance, and a polished, professional appearance.
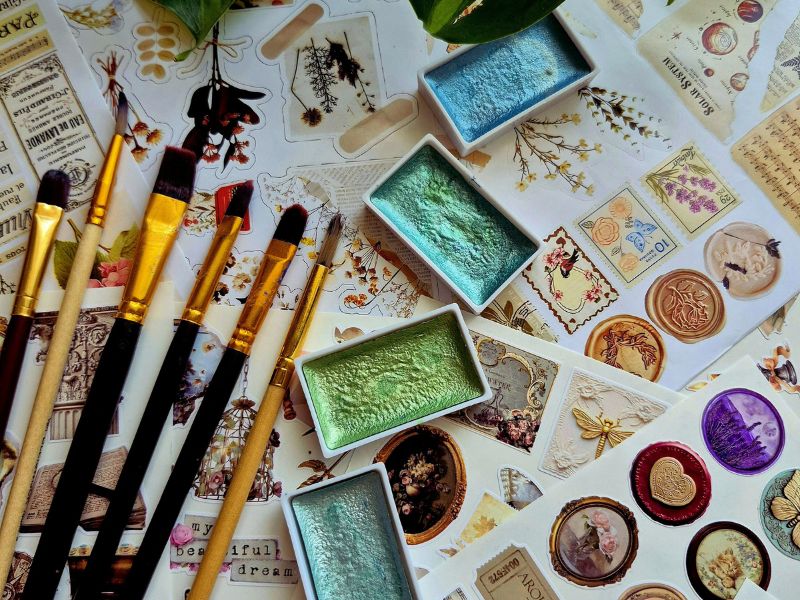
Brush Selection
-
Ultra-fine brushes: Windsor & Newton Series 7, sizes 00–0000.
-
Single-hair brushes: For extreme detail.
-
Alternative applicators: Toothpicks or oilers, especially for lume.
Additional Essential Tools
Essential tools for watch painting include magnification devices such as a loupe, microscope, or magnifying lamp to ensure precision.
Use a zinc-based or metal primer for proper paint adhesion, and prepare surfaces with sandpaper ranging from 300 to 1500 grit. Metal polish, like Brasso, helps achieve a smooth finish.
For protecting details, use precision masking tape or masking gel (e.g., Humbrol Maskol), along with protective gear such as finger cots or rubber gloves. Additionally, keep paint thinner, clear coat, and workspace protection on hand for cleanup and finishing.
Optional Advanced Tools
For more advanced watch painting projects, an airbrush can provide a smooth, even coating across the dial.
Using filmless waterslide decal paper allows for precise design application, while a UV lamp is useful for curing resin coatings quickly and effectively.
Additionally, DIY dial holders can offer stability, keeping components securely in place during detailed work.
Preparation Process
Watch Disassembly
Begin by carefully removing the dial from the movement to avoid damaging delicate components.
When working with vintage radium dials, handle them with extra caution, looking for signs such as brown paint, “Ra” markings, or crystal shadows that indicate radioactive material.
Ensure that all components are stored safely to prevent scratches, bending, or other damage during the painting process.
Cleaning the Surface
Removing Old Paint/Printing
To prepare a watch dial for repainting, remove old paint or printing using progressive sanding from 300 to 1500 grit or carefully apply chemical paint strippers with caution.
Before starting, decide whether to paint over the existing finish or fully remove it to ensure the best possible results and adhesion for the new paint.
Surface Preparation
Before painting, clean the watch components thoroughly with soapy water and degrease them to remove oils and residues.
Follow this by polishing with Brasso to achieve a smooth, reflective surface, and ensure everything is completely dry before beginning the painting process for optimal adhesion and finish.
Masking Hour Markers and Indices
When painting a watch dial, use precision masking tape or masking gel to protect hour markers and complex shapes from unwanted paint.
As an alternative, you can remove the markers entirely and reapply them after the painting process, ensuring a clean and professional finish.
Creating a Work Station
Set up your workspace by creating a DIY dial holder using cardboard with pinhole positioning to secure the dial during painting.
Clearly mark the 3-6-9-12 o’clock reference points for accurate alignment. Ensure the area has bright, even lighting and is dust-free to maintain precision and prevent imperfections on the painted surface.
Painting Techniques
Priming
Metal surfaces naturally resist paint, so applying a primer is essential to ensure proper adhesion. Use a zinc-based primer and apply it in thin, even layers across the surface.
Once applied, allow the primer to fully dry and test its adhesion before proceeding with the paint to ensure a smooth, long-lasting finish.
Base Coat Application
Spray Method (Recommended)
When using the spray method, apply 3–5 thin coats, or up to 15 for professional-level results, to achieve an even base.
Maintain a consistent distance and angle between the spray and the dial to prevent drips or uneven coverage.
Allow each coat to dry thoroughly before applying the next, and consider oven-drying to speed up curing and ensure a smooth finish.
Hand Painting
For effective hand painting, ensure the paint consistency is liquid but not watery to allow smooth application.
Apply multiple thin coats rather than thick layers, which can shrink or crack as they dry. When working on textured surfaces, such as guilloche patterns, take care to preserve the original texture while applying the paint evenly.
Detailed Work (Markers, Numbers, Text)
Hand Painting
When hand-painting a watch dial, always work under magnification to ensure precision and accuracy.
Maintain consistent brush strokes and paint consistency to achieve a smooth, professional finish. Most importantly, patience is key, as skill and control improve significantly with practice over time.
Alternative Methods
Alternative methods for watch dial detailing include waterslide decals, where designs are created digitally, printed, and applied using a setting solution for precise placement.
Another technique is “etch and fill,” which involves engraving designs into the base coat and then filling the engraved areas with contrasting paint to achieve sharp, long-lasting details.
Painting Watch Hands
When painting watch hands, position them upside down on a toothpick for stability and precision. Carefully apply paint into the recesses, taking care to avoid overflow onto the hand’s surface.
Depending on the design, use either lume paint or regular enamel to achieve the desired finish and functionality.
Common Mistakes to Avoid
When painting a watch, avoid applying paint too thickly, as this can lead to shrinkage or cracks. Make sure there is sufficient drying time between coats to prevent imperfections.
Always work under magnification to catch fine details, and never paint over dust or oils, which can compromise adhesion.
Additionally, skipping the primer can result in poor paint bonding and reduced durability, so this step should never be overlooked.
Finishing and Protection
Applying Lume to Hour Markers
When applying lume to hour markers, use a medium oiler to ensure precise and controlled placement. Aim for a depth of around 0.3mm to achieve a consistent and even glow. It’s highly recommended to practice on scrap dials first to perfect your technique before working on a final piece.
Clear Coat/Sealing
Applying a clear coat or sealing layer protects the watch dial from scratches, fading, and brass tarnish, preserving the paintwork over time.
Whether using spray lacquer or UV resin, it’s best to apply multiple thin layers for even coverage and durability.
Additionally, consider the environmental impact when choosing between solvent-based and water-based products to balance performance with safety.
Curing Process & Quality Control
After painting, allow the lacquer to cure at room temperature or use UV lamps for resin coatings to ensure proper hardening.
Carefully inspect the painted surface under magnification to check for bubbles, cracks, or uneven areas.
If imperfections are found, you may need to strip the paint and restart, though hobbyist-level results can still be highly satisfying and visually impressive.

Advanced Techniques (Optional)
Gilt-Relief Dials
Gilt-relief dials are a vintage style that exposes the brass beneath the paint, creating a layered, luxurious look.
This technique involves carving or masking negative spaces and then filling them with contrasting paint to highlight details. Modern brands, such as MKII Kingston, continue to use this method to achieve an authentic vintage aesthetic.
Gradient/Fumé Dials
Creating gradient or fumé dials involves achieving an ombré effect by using a spray technique on a rotating dial, allowing colors to transition smoothly across the surface.
Controlling the speed of rotation and the spray power is essential to ensure even, seamless color gradients and professional-looking results.
Professional-Level Alternatives
For those seeking the highest level of precision, professional-level alternatives include pad printing, galvanic coating, or vitreous enamel.
These techniques often require specialized equipment and kilns capable of high-temperature curing, making them challenging for home use.
Because of the complexity and investment involved, many watch enthusiasts choose to outsource these processes when exacting accuracy and a flawless finish are critical.
Troubleshooting Common Problems
| Problem | Solution |
|---|---|
| Paint not adhering | Use primer, prep surface properly |
| Visible brush strokes | Thin paint, use finer brushes, try spray |
| Cracking/shrinkage | Apply thinner coats, allow drying |
| Uneven color | Apply consistent coats, mix paint thoroughly |
| Lume bleeding | Mask carefully, apply with a toothpick |
| Clear coat clouding | Ensure a humidity-free environment, compatible products |
| Text smudging | Wait for full drying before handling |
Practice and Expectations
When learning to paint a watch perfectly, it’s best to start with cheap donor dials to practice without risking valuable components.
Accept that your first attempts likely won’t be flawless, and remember that skill improves gradually over time. Mistakes are valuable learning opportunities.
Engaging with the watchmaking community, such as forums like WatchUSeek, can provide tips, guidance, and feedback from experienced hobbyists.
Additionally, watching video demonstrations allows you to observe techniques in real time, helping refine your brush control, layering, and finishing methods, ultimately building confidence and competence in watch painting.
Conclusion
Painting a watch perfectly is challenging but achievable with patience, proper materials, and careful technique. The satisfaction of customizing or restoring a dial makes every step worthwhile.
Key success factors include preparation, thin coats, magnification, and attention to detail. Start small with a sacrificial dial and experiment—you’ll improve with every attempt. Remember, the goal is skill and creativity, not perfection.
FAQs
1. What is the best paint for watch dials?
Enamel paint is recommended for durability, smooth finish, and adhesion.
2. Can I paint a watch at home?
Yes, with the right tools, magnification, and patience, DIY results are achievable.
3. How do I prevent brush strokes on a dial?
Use ultra-fine brushes, thin paint coats, and consider spray applications.
4. Is it safe to paint vintage radium dials?
Handle carefully; avoid inhaling dust, and use protective gear.
5. How long should the paint cure before reassembling?
Allow full drying for lacquer or UV curing for resin before handling components.